Installation of the Centering Tube
The Centering Tube is used to mount and fixate the MRI CryoProbe™ coil head in the magnet bore.
The animal cradle is to be inserted from the animal preparation end and is directed and positioned by the Centering Tube.
The fixation of the Centering Tube depends on the size of the magnet bore, the gradient system and on the presence of a CCM cabinet. Therefore, the mounting process varies.
Generally, the Centering Tube is a straight tube of the length of the magnet with adjustable holders. It should not contact the gradient system to avoid transfer of vibrations while scanning. It is supported at both ends of the magnet.

A three-claw fastener holds the Centering Tube at the service end of the magnet. Since the water hoses and cables for the gradient are also leaving the gradient tube on the service end, the claw may be turned in any orientation such that is does not interfere with the water hoses or cables.
Install it as shown below and center the holding for the Centering Tube.
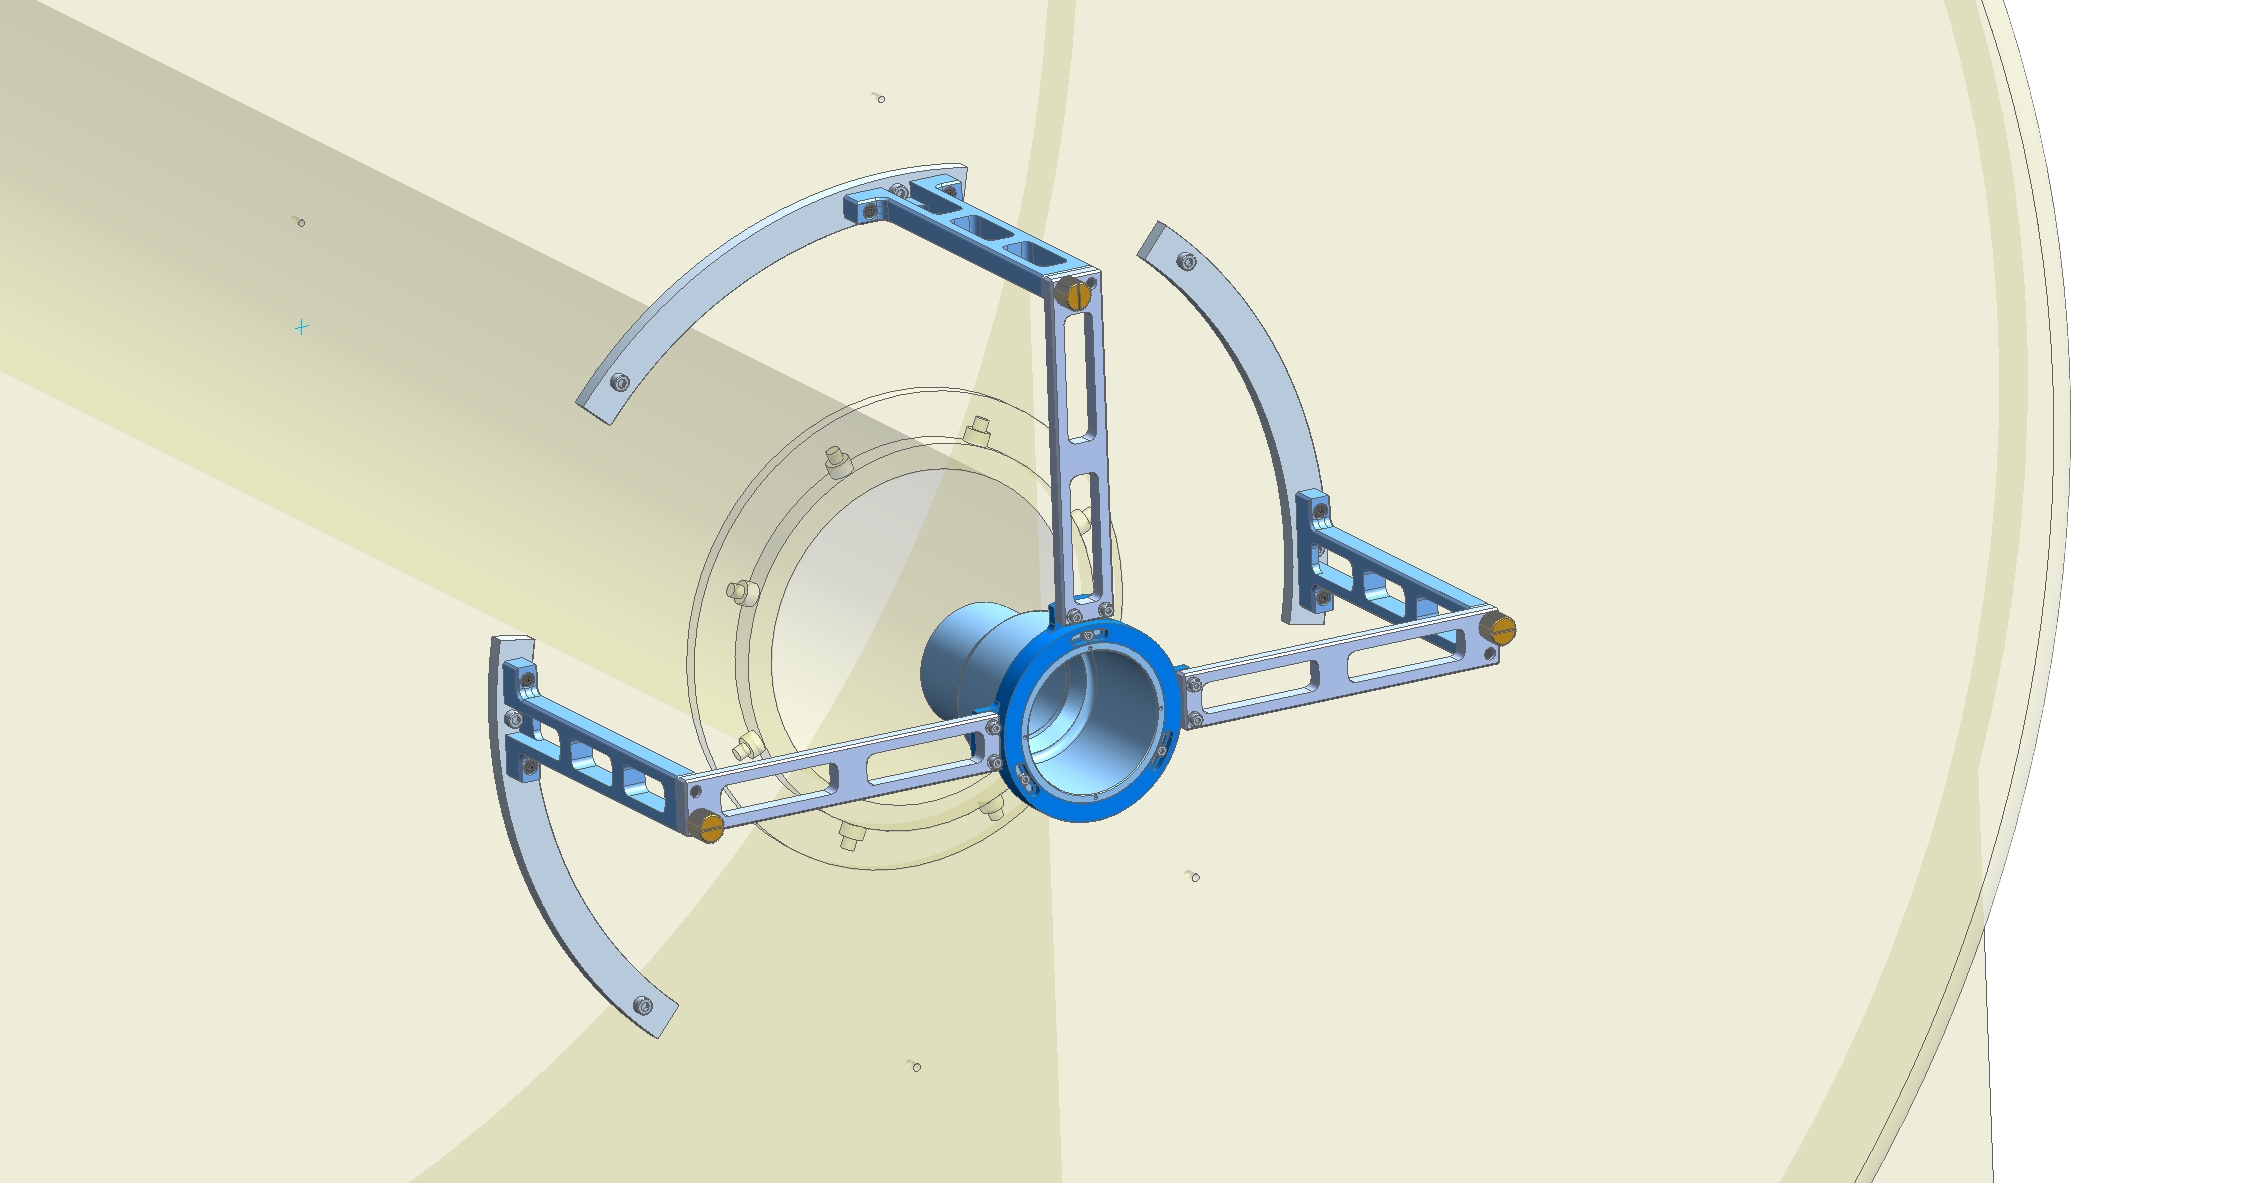

On the preparation table end of the magnet, install the front fixation and insert the Centering Tube.


When inserted, the Centering Tube will fit into the adapter at the service end.
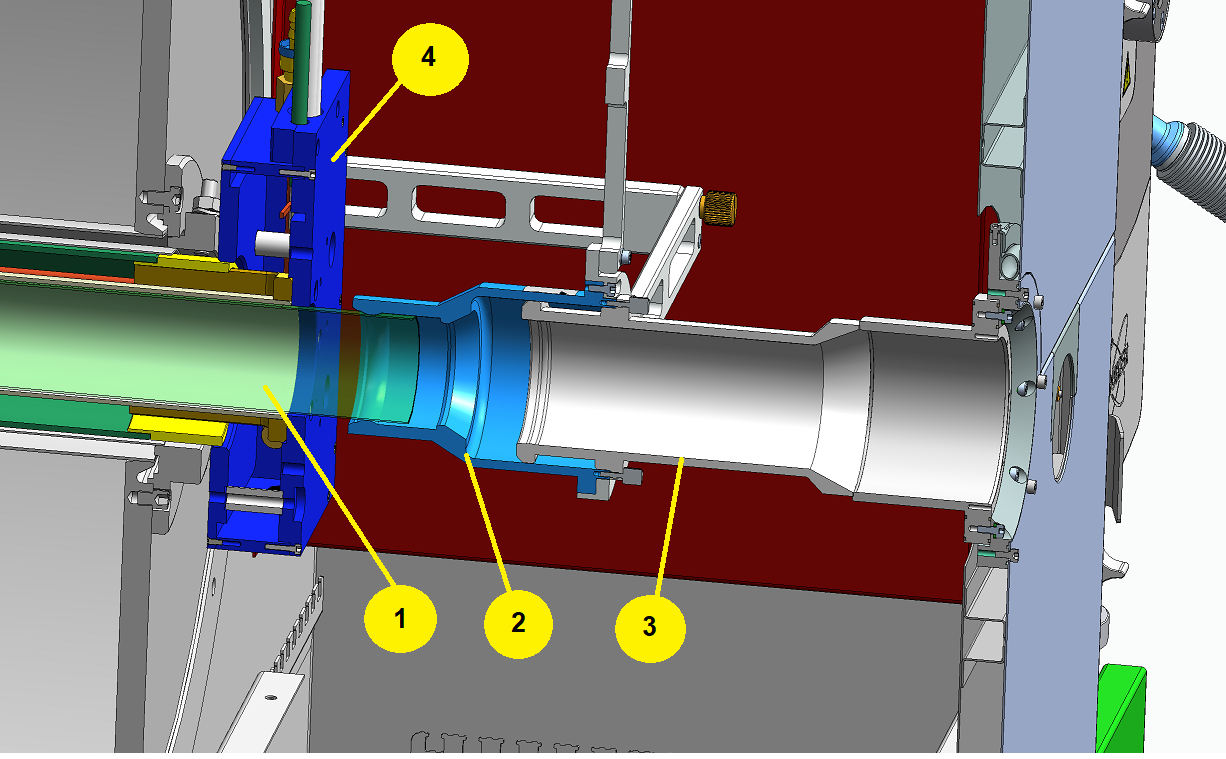
Finally, tighten the Centering Tube with the screws at the clamp ring.

