Sample Positioning using the ATS
In order to position a sample in the center of the imaging instrument, proceed as follows:
- ▪
- Prepare the sample on the corresponding animal cradle.
- ▪
- Connect the animal cradle to the ATS using the quick lock mechanism.
- ▪
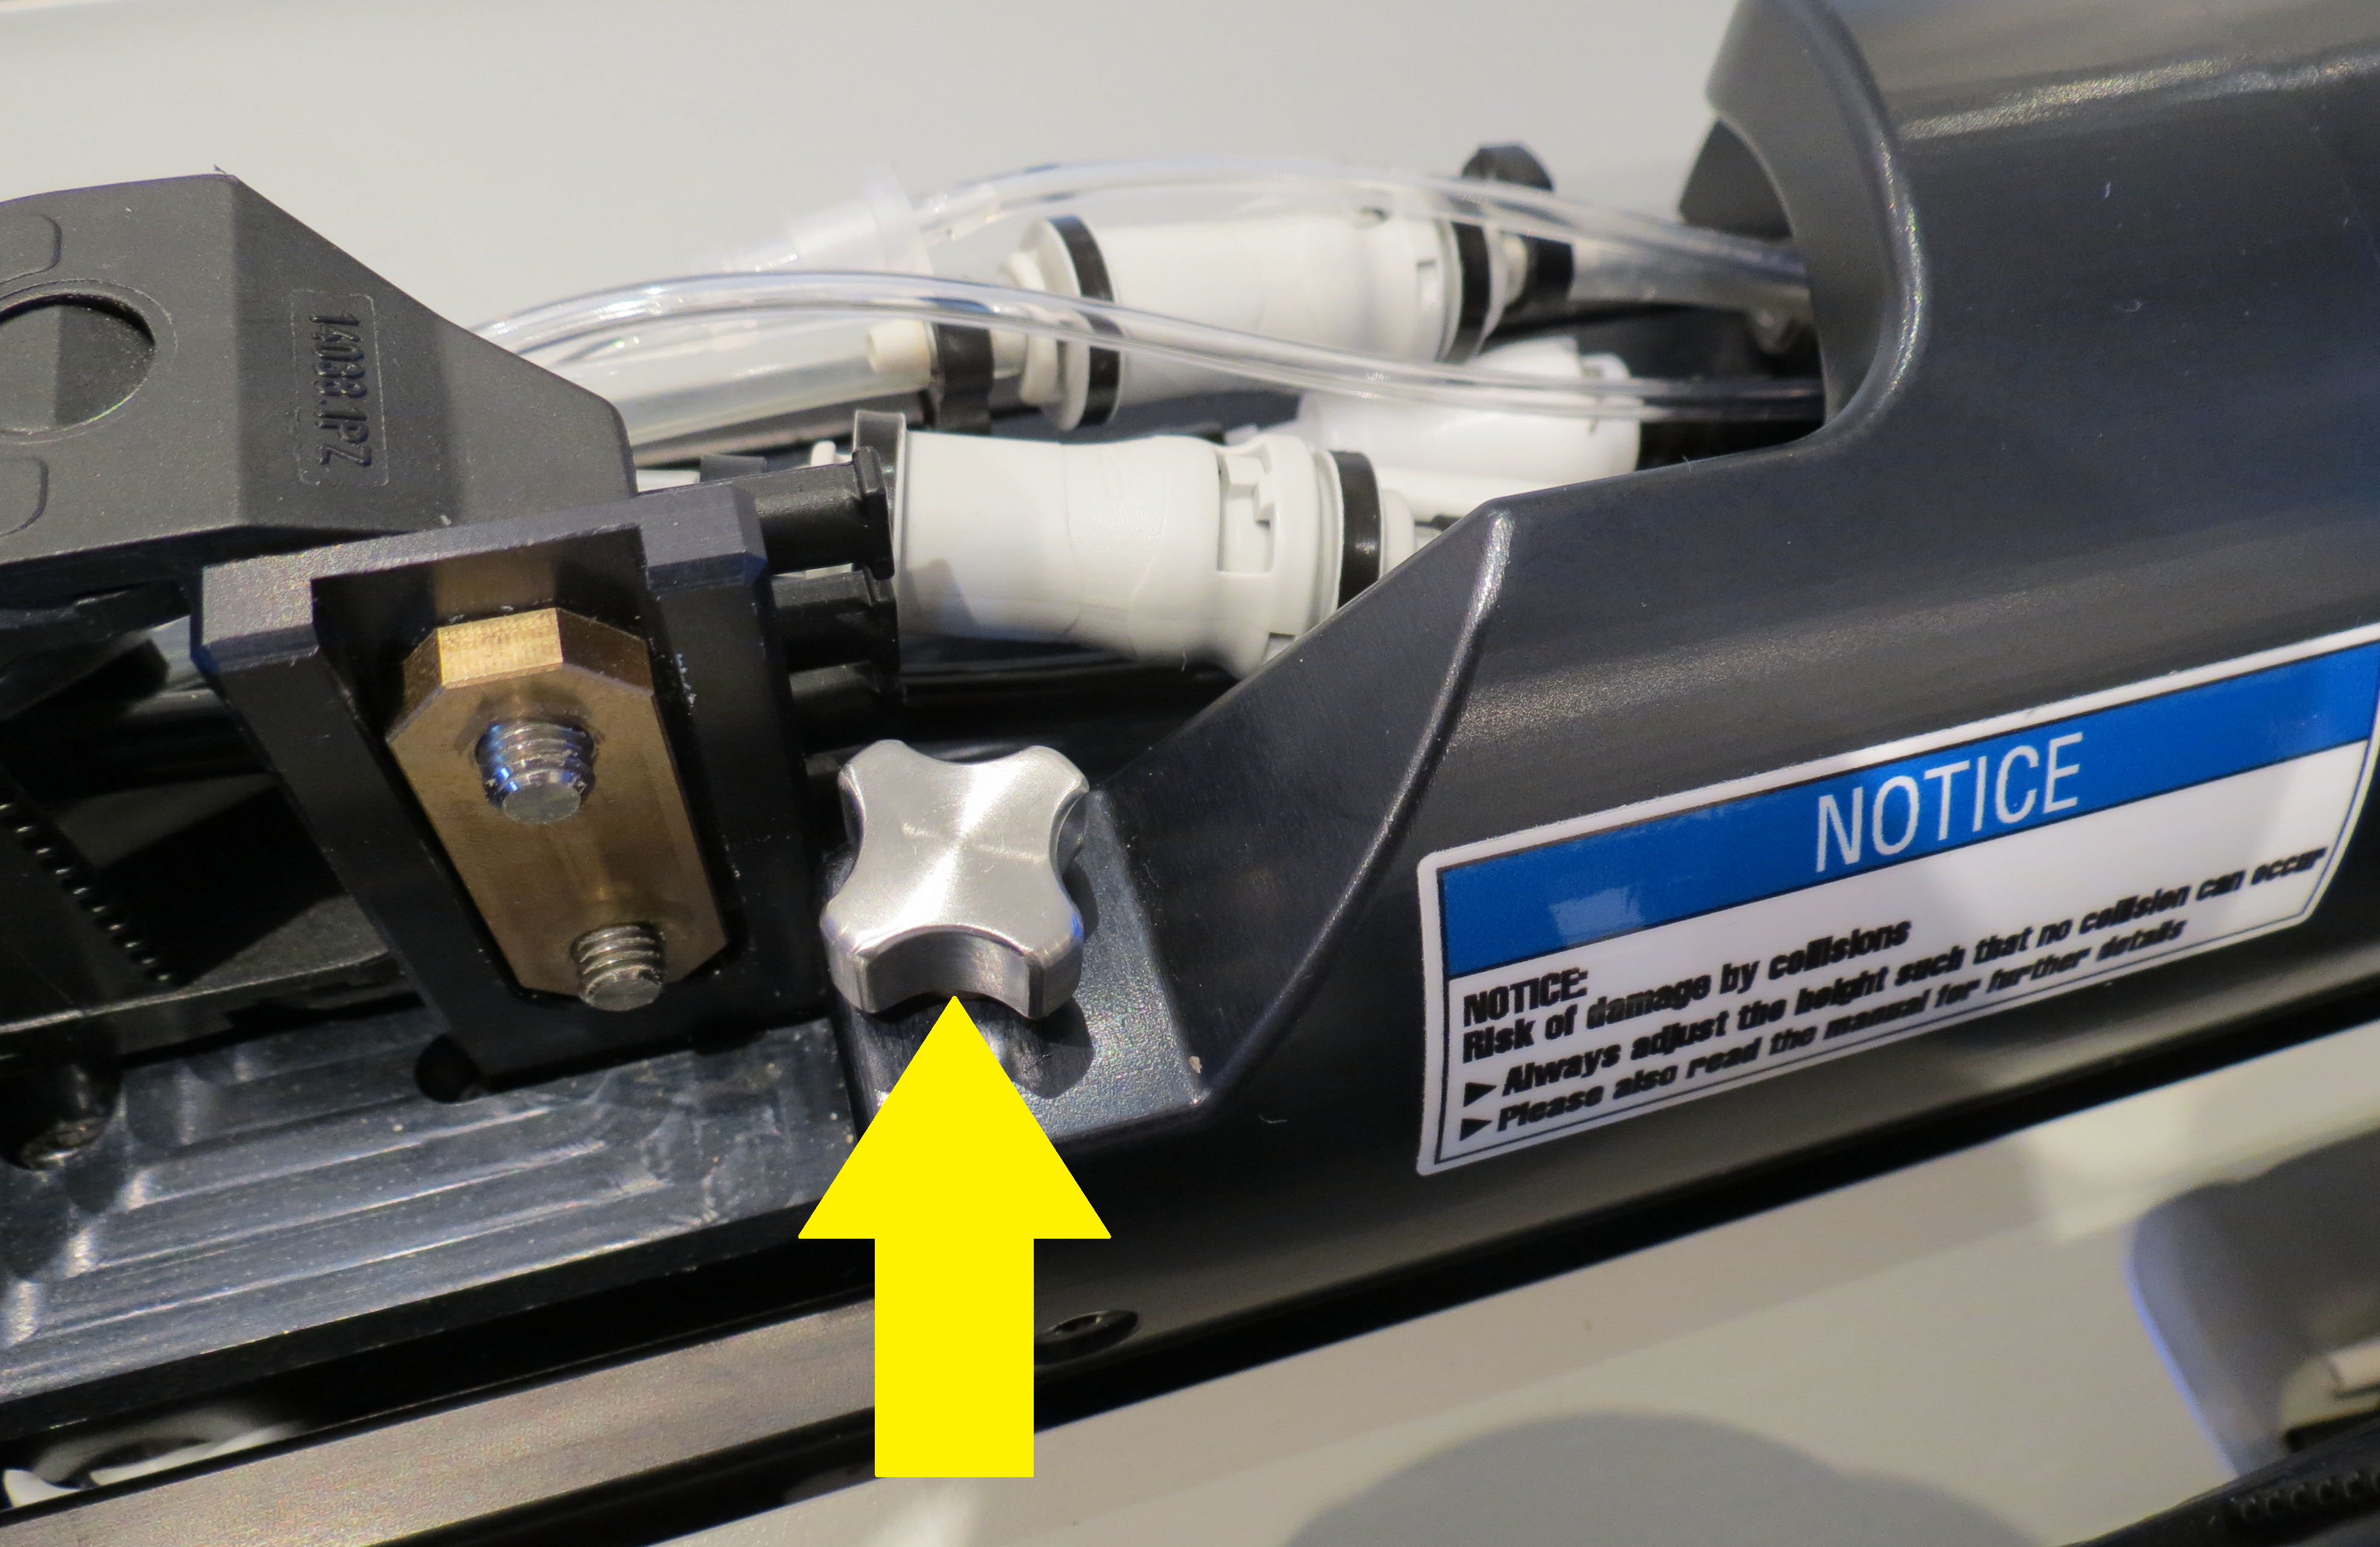
- Height Adjustment: The lever of the ATS drive train allows (see figure below) a small height adjustment. This may be of use to avoid vertical blockage in narrow setups or to position the region of interest precisely in the vertical center of the imaging instrument.
- ▪
- Use the camera button
![Titel : Camera Button_5mm [blue]
ID : 1977919499 Camera Button_5mm [blue]](Images/png/1977919499__Web.png) to move the ATS to the camera view position used to define the desired imaging location. In the camera view position the sample area is displayed in the camera view.
to move the ATS to the camera view position used to define the desired imaging location. In the camera view position the sample area is displayed in the camera view.
- ▪
- In the camera view, slide/move the red cross-hair on the touchscreen with the finger in the desired position, e. g. heart of a mouse.
Alternatively use![Titel : CameraArrow_Icon_up 5mm [blue]
ID : 1983012491 CameraArrow_Icon_up 5mm [blue]](Images/png/1983012491__Web.png) or
or ![Titel : CameraArrow_Icon_down 5mm [blue]
ID : 1983017227 CameraArrow_Icon_down 5mm [blue]](Images/png/1983017227__Web.png) buttons for changing the cross-hair position.
buttons for changing the cross-hair position.
- ▪
- Confirm the sample position via the
![Titel : Camera_WheelDoubleArrow 5mm [blue]
ID : 1984825995 Camera_WheelDoubleArrow 5mm [blue]](Images/png/1984825995__Web.png) button. The
button. The ![Titel : Camera_WheelDoubleArrow 5mm [blue]
ID : 1984825995 Camera_WheelDoubleArrow 5mm [blue]](Images/png/1984825995__Web.png) changes into a blue check mark
changes into a blue check mark ![Titel : Checkmark_5mm [blue]
ID : 1984833291 Checkmark_5mm [blue]](Images/png/1984833291__Web.png) and the system takes a photo of the current sample position automatically.
and the system takes a photo of the current sample position automatically.
- ▪
- Touch the
![Titel : MR Button_5mm [blue]
ID : 1977924363 MR Button_5mm [blue]](Images/png/1977924363__Web.png) button to move the sample to the measurement position in the center of the magnet. You can stop the movement any time pressing the red button at the user panel in the front cover. Alternatively, use initially the manual movement button
button to move the sample to the measurement position in the center of the magnet. You can stop the movement any time pressing the red button at the user panel in the front cover. Alternatively, use initially the manual movement button ![Titel : Arrow Button – forwards 5mm [blue]
ID : 1981914507 Arrow Button – forwards 5mm [blue]](Images/png/1981914507__Web.png) for the first movement to control the drive train visually while pressing the button.
for the first movement to control the drive train visually while pressing the button.


